Quarkus - 构建本机可执行文件
准备
要完成本指南,需要:
|
用 C 支持原生编译
正常工作的 C 开发环境是什么意思? * 在Linux上,您将需要 GCC 以及 glibc 和 zlib 头文件。常用 linux 上安装方式: +
|
配置 GraalVM
|
如果无法安装 GraalVM,则可以使用多阶段 Docker 构建在 GraalVM 的 Docker 容器内运行 Maven 。本指南的末尾有关于如何执行此操作的说明。 |
需要版本 19.3.1 . 社区版就够用了 .
-
如果尚未安装 GraalVM ,请先安装。您可以选择以下几种方法:
-
从 https://github.com/graalvm/graalvm-ce-builds/releases 下载适当的压缩包, 然后像解压缩其他JDK一样将其解压缩。
-
配置运行时环境. 将环境变量
GRAALVM_HOME设置为 GraalVM 安装目录,如:export GRAALVM_HOME=$HOME/Development/graalvm/On macOS, point the variable to the
Homesub-directory:export GRAALVM_HOME=$HOME/Development/graalvm/Contents/Home/On Windows, you will have to go through the Control Panel to set your environment variables.
Installing via scoop will do this for you.
-
Install the
native-imagetool usinggu install:${GRAALVM_HOME}/bin/gu install native-imageSome previous releases of GraalVM included the
native-imagetool by default. This is no longer the case; it must be installed as a second step after GraalVM itself is installed. Note: there is an outstanding issue using GraalVM with macOS Catalina. -
(Optional) Set the
JAVA_HOMEenvironment variable to the GraalVM installation directory.export JAVA_HOME=${GRAALVM_HOME} -
(Optional) Add the GraalVM
bindirectory to the pathexport PATH=${GRAALVM_HOME}/bin:$PATH
|
Issues using GraalVM with macOS Catalina
GraalVM binaries are not (yet) notarized for macOS Catalina as reported in this GraalVM issue. This means that you may see the following error when using Use the following command to recursively delete the |
完整代码
We recommend that you follow the instructions in the next sections and package the application step by step. However, you can go right to the completed example.
Clone the Git repository: git clone https://github.com/quarkusio/quarkus-quickstarts.git, or download an archive.
The solution is located in the getting-started directory.
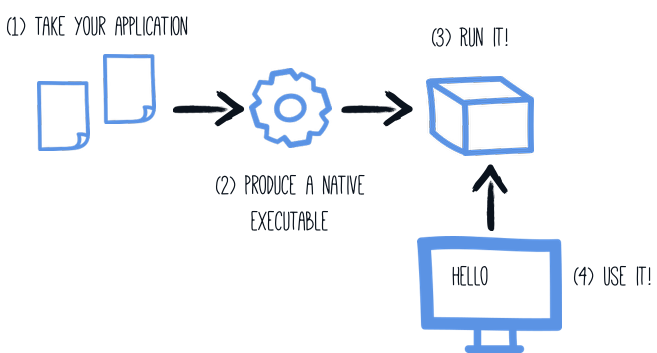
Producing a native executable
The native executable for our application will contain the application code, required libraries, Java APIs, and a reduced version of a VM. The smaller VM base improves the startup time of the application and produces a minimal disk footprint.
If you have generated the application from the previous tutorial, you can find in the pom.xml the following profile:
<profiles>
    <profile>
        <id>native</id>
        <properties>
            <quarkus.package.type>native</quarkus.package.type>
        </properties>
    </profile>
</profiles>|
You can provide custom options for the Another possibility is to include the You can find more information about how to configure the native image building process in the 配置原生镜像 section below. |
We use a profile because, you will see very soon, packaging the native executable takes a few minutes. You could just pass -Dquarkus.package.type=native as a property on the command line, however it is better to use a profile as this allows native image tests to also be run.
Create a native executable using: ./mvnw package -Pnative.
|
Issues with packaging on Windows
The Microsoft Native Tools for Visual Studio must first be initialized before packaging. You can do this by starting
the Another solution is to write a script to do this for you: |
In addition to the regular files, the build also produces target/getting-started-1.0-SNAPSHOT-runner.
You can run it using: ./target/getting-started-1.0-SNAPSHOT-runner.
测试原生执行文件
Producing a native executable can lead to a few issues, and so it’s also a good idea to run some tests against the application running in the native file.
In the pom.xml file, the native profile contains:
<plugin>
    <groupId>org.apache.maven.plugins</groupId>
    <artifactId>maven-failsafe-plugin</artifactId>
    <version>${surefire-plugin.version}</version>
    <executions>
        <execution>
            <goals>
                <goal>integration-test</goal>
                <goal>verify</goal>
            </goals>
            <configuration>
                <systemProperties>
                    <native.image.path>${project.build.directory}/${project.build.finalName}-runner</native.image.path>
                </systemProperties>
            </configuration>
        </execution>
    </executions>
</plugin>
This instructs the failsafe-maven-plugin to run integration-test and indicates the location of the produced native executable.
Then, open the src/test/java/org/acme/quickstart/NativeGreetingResourceIT.java. It contains:
package org.acme.quickstart;


import io.quarkus.test.junit.NativeImageTest;

@NativeImageTest (1)
public class NativeGreetingResourceIT extends GreetingResourceTest { (2)

    // Run the same tests

}| 1 | Use another test runner that starts the application from the native file before the tests.
The executable is retrieved using the native.image.path system property configured in the Failsafe Maven Plugin. |
| 2 | We extend our previous tests, but you can also implement your tests |
To see the NativeGreetingResourceIT run against the native executable, use ./mvnw verify -Pnative:
./mvnw verify -Pnative
...
[getting-started-1.0-SNAPSHOT-runner:18820]     universe:     587.26 ms
[getting-started-1.0-SNAPSHOT-runner:18820]      (parse):   2,247.59 ms
[getting-started-1.0-SNAPSHOT-runner:18820]     (inline):   1,985.70 ms
[getting-started-1.0-SNAPSHOT-runner:18820]    (compile):  14,922.77 ms
[getting-started-1.0-SNAPSHOT-runner:18820]      compile:  20,361.28 ms
[getting-started-1.0-SNAPSHOT-runner:18820]        image:   2,228.30 ms
[getting-started-1.0-SNAPSHOT-runner:18820]        write:     364.35 ms
[getting-started-1.0-SNAPSHOT-runner:18820]      [total]:  52,777.76 ms
[INFO]
[INFO] --- maven-failsafe-plugin:2.22.1:integration-test (default) @ getting-started ---
[INFO]
[INFO] -------------------------------------------------------
[INFO]  T E S T S
[INFO] -------------------------------------------------------
[INFO] Running org.acme.quickstart.NativeGreetingResourceIT
Executing [/data/home/gsmet/git/quarkus-quickstarts/getting-started/target/getting-started-1.0-SNAPSHOT-runner, -Dquarkus.http.port=8081, -Dtest.url=http://localhost:8081, -Dquarkus.log.file.path=build/quarkus.log]
2019-04-15 11:33:20,348 INFO  [io.quarkus] (main) Quarkus 999-SNAPSHOT started in 0.002s. Listening on: http://[::]:8081
2019-04-15 11:33:20,348 INFO  [io.quarkus] (main) Installed features: [cdi, resteasy]
[INFO] Tests run: 2, Failures: 0, Errors: 0, Skipped: 0, Time elapsed: 1.387 s - in org.acme.quickstart.NativeGreetingResourceIT
...|
By default, Quarkus waits for 60 seconds for the native image to start before automatically failing the native tests. This
duration can be changed using the |
By default, native tests runs using the prod profile.
This can be overridden using the quarkus.test.native-image-profile property.
For example, in your application.properties file, add: quarkus.test.native-image-profile=test.
Alternatively, you can run your tests with: ./mvnw verify -Pnative -Dquarkus.test.native-image-profile=test.
However, don’t forget that when the native executable is built the prod profile is enabled.
So, the profile you enable this way must be compatible with the produced executable.
执行原生程序时排除测试
When running tests this way, the only things that actually run natively are you application endpoints, which you can only test via HTTP calls. Your test code does not actually run natively, so if you are testing code that does not call your HTTP endpoints, it’s probably not a good idea to run them as part of native tests.
If you share your test class between JVM and native executions like we advise above, you can mark certain tests
with the @DisabledOnNativeImage annotation in order to only run them on the JVM.
测试原生执行文件
It is also possible to re-run the tests against a native executable that has already been built. To do this run
./mvnw test-compile failsafe:integration-test. This will discover the existing native image and run the tests against it using
failsafe.
If the process cannot find the native image for some reason, or you want to test a native image that is no longer in the
target directory you can specify the executable with the -Dnative.image.path= system property.
创建容器
| Before going further, be sure to have a working container runtime (Docker, podman) environment. |
You can run the application in a container using the JAR produced by the Quarkus Maven Plugin. However, in this guide we focus on creating a container image using the produced native executable.
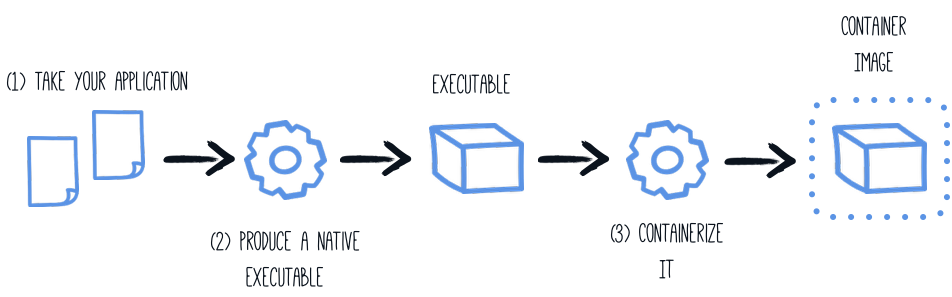
By default, the native executable is tailored for your operating system (Linux, macOS, Windows etc). Because the container may not use the same executable format as the one produced by your operating system, we will instruct the Maven build to produce an executable from inside a container:
./mvnw package -Pnative -Dquarkus.native.container-build=true|
You can also select the container runtime to use with: These are normal Quarkus config properties, so if you always want to build in a container
it is recommended you add these to your |
The produced executable will be a 64 bit Linux executable, so depending on your operating system it may no longer be runnable.
However, it’s not an issue as we are going to copy it to a container.
The project generation has provided a Dockerfile.native in the src/main/docker directory with the following content:
FROM registry.access.redhat.com/ubi8/ubi-minimal
WORKDIR /work/
COPY target/*-runner /work/application
RUN chmod 775 /work
EXPOSE 8080
CMD ["./application", "-Dquarkus.http.host=0.0.0.0"]
Then, if you didn’t delete the generated native executable, you can build the docker image with:
docker build -f src/main/docker/Dockerfile.native -t quarkus-quickstart/getting-started .And finally, run it with:
docker run -i --rm -p 8080:8080 quarkus-quickstart/getting-started| Interested by tiny Docker images, check the distroless version. |
使用 Docker 多阶段构建容器
The previous section showed you how to build a native executable using Maven, but implicitly required that the proper GraalVM version be installed on the building machine (be it your local machine or your CI/CD infrastructure).
In cases where the GraalVM requirement cannot be met, you can use Docker to perform the Maven build by using a multi-stage Docker build. A multi-stage Docker build is like two Dockerfile files combined in one, the first is used to build the artifact used by the second.
In this guide we will use the first stage to generate the native executable using Maven and the second stage to create our runtime image.
## Stage 1 : build with maven builder image with native capabilities
FROM quay.io/quarkus/centos-quarkus-maven:19.3.1-java11 AS build
COPY src /usr/src/app/src
COPY pom.xml /usr/src/app
USER root
RUN chown -R quarkus /usr/src/app
USER quarkus
RUN mvn -f /usr/src/app/pom.xml -Pnative clean package

## Stage 2 : create the docker final image
FROM registry.access.redhat.com/ubi8/ubi-minimal
WORKDIR /work/
COPY --from=build /usr/src/app/target/*-runner /work/application
RUN chmod 775 /work
EXPOSE 8080
CMD ["./application", "-Dquarkus.http.host=0.0.0.0"]
Save this file in src/main/docker/Dockerfile.multistage as it is not included in the getting started quickstart.
|
Before launching our Docker build, we need to update the default |
docker build -f src/main/docker/Dockerfile.multistage -t quarkus-quickstart/getting-started .And finally, run it with:
docker run -i --rm -p 8080:8080 quarkus-quickstart/getting-started|
If you need SSL support in your native executable, you can easily include the necessary libraries in your Docker image. Please see our Using SSL With Native Executables guide for more information. |
配置原生镜像
There are a lot of different configuration options that can affect how the native image is generated.
These are provided in application.properties the same as any other config property.
The properties are shown below:
Configuration property fixed at build time - All other configuration properties are overridable at runtime
Type |
Default |
|
|---|---|---|
Additional arguments to pass to the build process |
list of string |
|
If the HTTP url handler should be enabled, allowing you to do URL.openConnection() for HTTP URLs |
boolean |
|
If the HTTPS url handler should be enabled, allowing you to do URL.openConnection() for HTTPS URLs |
boolean |
|
If all security services should be added to the native image |
boolean |
|
If all character sets should be added to the native image. This increases image size |
boolean |
|
If all time zones should be added to the native image. This increases image size |
boolean |
|
The location of the Graal distribution |
string |
|
The location of the JDK |
|
|
The maximum Java heap to be used during the native image generation |
string |
|
If debug symbols should be included |
boolean |
|
If the native image build should wait for a debugger to be attached before running. This is an advanced option and is generally only intended for those familiar with GraalVM internals |
boolean |
|
If the debug port should be published when building with docker and debug-build-process is true |
boolean |
|
If the native image server should be restarted |
boolean |
|
If isolates should be enabled |
boolean |
|
If a JVM based 'fallback image' should be created if native image fails. This is not recommended, as this is functionally the same as just running the application in a JVM |
boolean |
|
If the native image server should be used. This can speed up compilation but can result in changes not always being picked up due to cache invalidation not working 100% |
boolean |
|
If all META-INF/services entries should be automatically registered |
boolean |
|
If the bytecode of all proxies should be dumped for inspection |
boolean |
|
If this build should be done using a container runtime. If this is set docker will be used by default, unless container-runtime is also set. |
boolean |
|
The docker image to use to do the image build |
string |
|
The container runtime (e.g. docker) that is used to do an image based build. If this is set then a container build is always done. |
string |
|
Options to pass to the container runtime |
list of string |
|
If the resulting image should allow VM introspection |
boolean |
|
If full stack traces are enabled in the resulting image |
boolean |
|
If the reports on call paths and included packages/classes/methods should be generated |
boolean |
|
If exceptions should be reported with a full stack trace |
boolean |
|
If errors should be reported at runtime. This is a more relaxed setting, however it is not recommended as it means your application may fail at runtime if an unsupported feature is used by accident. |
boolean |
|
下一步
This guide covered the creation of a native (binary) executable for your application. It provides an application exhibiting a swift startup time and consuming less memory. However, there is much more.
We recommend continuing the journey with the deployment to Kubernetes and OpenShift.

